
Maximize Space with Small Kitchen Remodel Ideas
- Devin Scott

- Nov 4, 2025
- 16 min read
Maximize Space with Small Kitchen Remodel Ideas: Expert Tips for Long Island Homeowners
Small kitchens challenge homeowners to balance cooking performance, storage, and comfort within limited square footage, making deliberate design the difference between cluttered chaos and efficient flow.
This guide explains proven strategies to maximize space through smarter storage, efficient layouts, clever design tricks, budget-conscious sequencing, and compact appliance selection so Long Island homeowners can plan a small kitchen remodel with confidence.
You will learn how vertical systems reclaim wasted zones, which layouts deliver the most usable workspace for narrow footprints, and design techniques—color, finishes, lighting—that make a compact kitchen feel larger and brighter.
The article also walks through phased budgeting and appliance choices that preserve function without expanding the footprint, plus local considerations for contractor selection on Long Island.
How Can Smart Storage Solutions Maximize Space in Small Kitchens?
Smart storage converts previously unused or underused volume into reliable, accessible capacity, improving functionality and reducing countertop clutter.
By prioritizing vertical storage, pull-out systems, and hidden compartments, homeowners can store more within the same footprint while keeping frequently used items handy.
The mechanism is straightforward: increase organized surface area and reduce friction during everyday tasks, which boosts perceived space and actual usability.
Below we outline top storage tactics, highlight practical installation tips, and compare common systems so you can select options that match budget and cooking habits.
Smart storage strategies often begin with mapping how you use the kitchen by frequency and task; this helps position pull-outs and zones logically. The following list highlights high-impact storage tactics to consider for a remodel or retrofit.
Vertical Floor-to-Ceiling Cabinets: Capture dead vertical space for infrequent items and seasonal gear.
Pull-Out Pantry Systems: Narrow, tall roll-outs provide deep-access storage with minimal footprint loss.
Toe-Kick Drawers: Use plinth space under cabinets for slim, hidden storage of trays and flatware.
Open Wall Shelving & Hanging Racks: Keep daily items visible and within reach to reduce drawer overload.
Multi-Functional Islands with Integrated Storage: Combine preparation surface with drawers and cubbies.
These focused tactics reclaim storage and improve workflow; the next section compares the most common storage types by capacity, cost, and installation complexity to help you decide which mix fits your kitchen and budget.
Different storage systems deliver distinct trade-offs in capacity, cost, and installation complexity; the table below helps compare common options for small-kitchen remodels.
Storage Type | Estimated Capacity | Cost Range | Installation Complexity | Best Use |
Pull-Out Pantry | High (narrow deep shelves) | $$-$$$ | Moderate (cabinet retrofit or custom) | Pantries in narrow spaces, canned goods |
Toe-Kick Drawer | Low–Medium (flat items) | $–$$ | Low (cabinet retrofit) | Baking sheets, seldom-used flatware |
Floor-to-Ceiling Cabinet | Very High | $$$ | High (custom cabinetry) | Long-term storage, appliances |
Open Wall Shelving | Low–Medium | $–$$ | Low | Everyday dishes, decorative items |
Multi-Functional Island Storage | Medium–High | $$-$$$ | Moderate | Prep zones, mixed storage and seating |
This comparison clarifies which storage elements offer the best capacity per dollar and where professional installation will materially affect performance; next we’ll look at vertical storage options in more detail.
What Are the Best Vertical Storage Options for Small Kitchens?
Vertical storage means stacking usable storage up the wall and into ceiling height, which multiplies capacity without expanding the footprint.
Floor-to-ceiling cabinetry provides sealed, dust-free storage and hides small appliances, while open shelving gives visual lightness and fast access for everyday items.
When selecting between the two, prioritize enclosed storage for bulky or infrequently used items and open shelves for attractive and frequently handled dishware.
Accessibility considerations—step stools, pull-down shelf hardware—make taller storage genuinely usable rather than merely aesthetic.
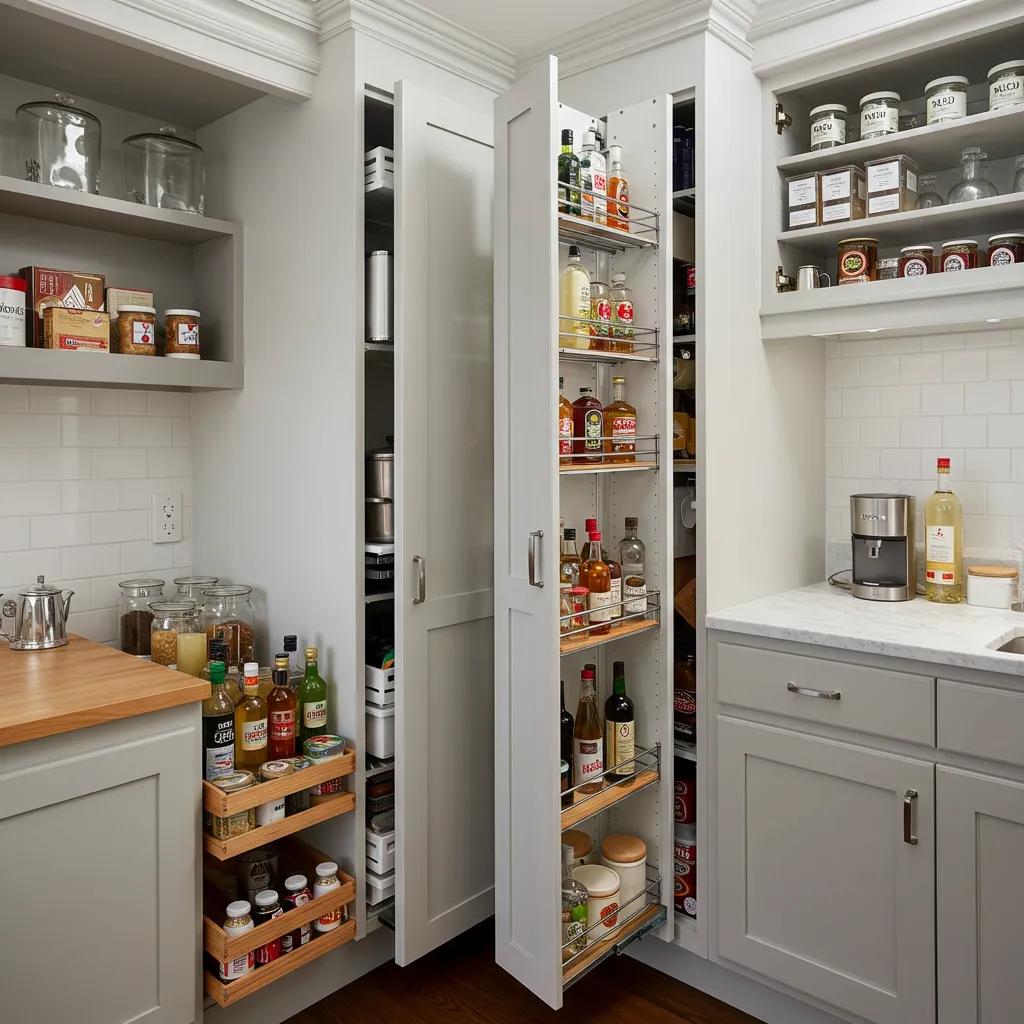
How Do Pull-Out Pantries and Toe-Kick Drawers Improve Kitchen Storage?
Pull-out pantries convert shallow, deep cabinets into fully accessible shelves, eliminating the lost space at the rear of fixed shelving.
Toe-kick drawers reclaim the otherwise wasted plinth area beneath base cabinets to store flat or infrequently used items, making the retrieval process simpler and less disruptive.
Both systems are cost-effective when retrofitted to existing cabinetry and dramatically improve usable volume per linear foot. Installation complexity varies: ready-made pull-outs fit common cabinet widths, while custom toe-kicks may require minor cabinet alterations.
Choosing between DIY kits and professional installation often depends on the cabinet condition and desired longevity; the next subsection will explore multi-functional storage that combines seating, prep, and storage.
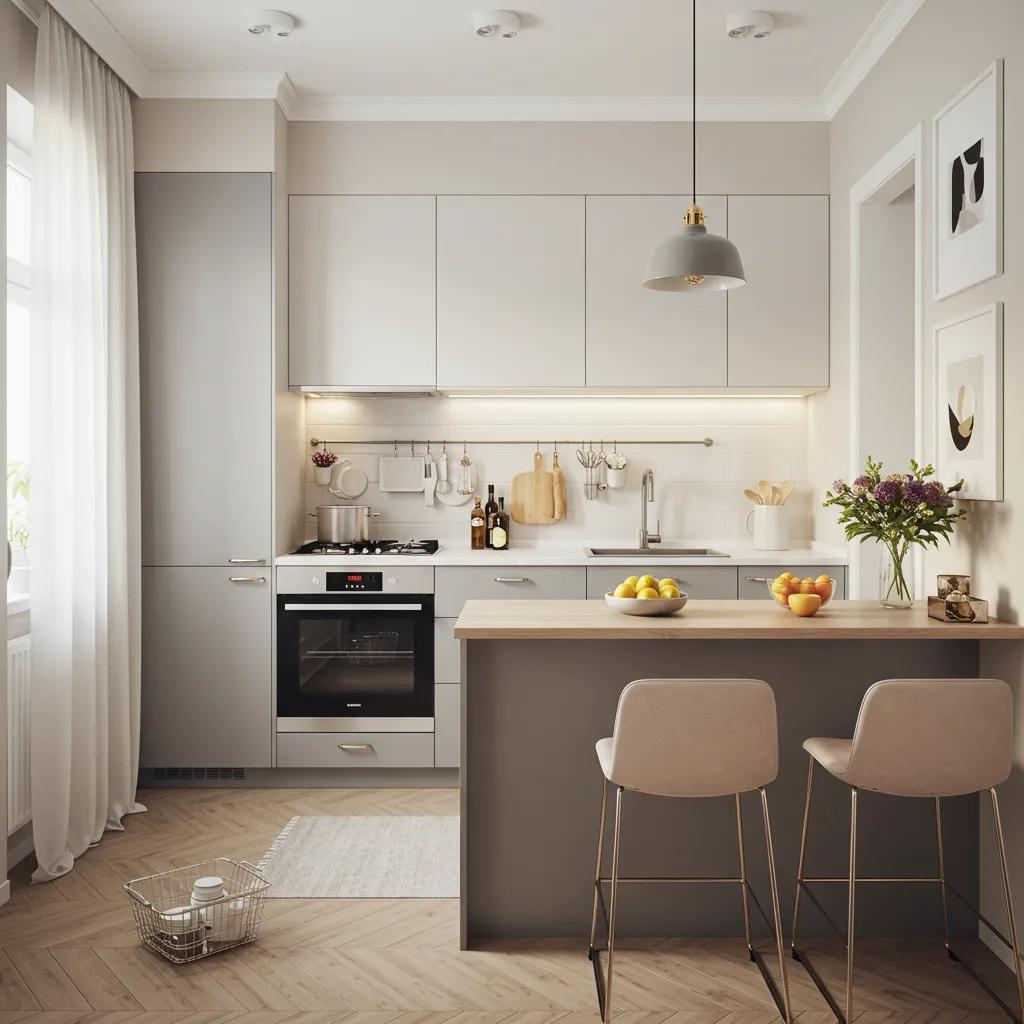
Which Multi-Functional Storage Ideas Save Space in Tiny Kitchens?
Multi-functional pieces—such as narrow islands with drawers, fold-down tables, and bench seating with internal storage—add workspace without demanding large clearances.
A compact island on casters provides prep surface and storage while allowing flexibility to move it out of the way during busy times.
Appliance garages hide countertop clutter and maintain a streamlined visual line, helping the kitchen read as larger.
Material choices matter: durable table tops and solid drawer glides extend lifespan of high-use multi-functional elements and protect the investment.
When selecting multi-functional furniture, prioritize items that match your routine—if you entertain often, choose seating-incorporated storage; if you cook daily, favor islands with dedicated utensil and cookware storage.
These choices set the stage for detailed cabinet organizer recommendations below.
What Are Practical Cabinet Organizers and Hidden Storage Solutions?
Cabinet organizers convert generic cabinet volume into efficient zones: spice pull-outs at eye level, lazy Susans in corner cabinets, and under-sink shelves designed for plumbing contours.
Frequency zoning—keeping everyday tools in the primary reach zone and lesser-used items higher or lower—improves daily workflow.
Hidden bins and slide-out trash systems reduce visual clutter and help with waste sorting in compact footprints.
Off-the-shelf organizers offer rapid, low-cost improvements, while custom inserts deliver precise fit and maximum capacity.
Investing in targeted organizers yields immediate gains in usability and can often defer more expensive cabinet replacement; next we’ll compare efficient layouts that pair best with these storage choices.
What Are Efficient Small Kitchen Layouts to Maximize Usable Space?
Efficient layouts allocate circulation, work zones, and storage so that every square foot contributes measurable function; the right layout depends on footprint, access points, and whether the kitchen opens to living areas.
Popular small-kitchen plans—galley, U-shaped, L-shaped, and peninsula—each balance counter length, storage, and flow differently.
The key mechanism is reducing unnecessary movement by clustering cooking, refrigeration, and cleanup within ergonomic distances, while keeping circulation paths clear.
Below is a comparative table to help you choose the optimal layout for your space.
Layout Type | Best For | Key Benefits | Trade-offs |
Galley Kitchen | Narrow, corridor-like spaces | Excellent linear storage and prep efficiency | Can feel narrow; needs visual opening strategies |
U-Shaped Kitchen | Compact but wider footprints | Lots of continuous counter space | Can become closed-off; requires corner solutions |
L-Shaped Kitchen | Open-plan living connections | Flexible work triangle and social flow | Less continuous counter space than U-shape |
Peninsula / Compact Island | Small open-plan kitchens | Extra prep surface and seating without full island | Requires careful clearance planning |
This comparison helps determine which layout aligns with your house plan and lifestyle needs; next, we analyze galley kitchens and how to optimize them for small-space performance.
How Does a Galley Kitchen Layout Benefit Small Kitchen Functionality?
A galley layout places two runs of cabinets opposite each other, minimizing steps between work zones and maximizing continuous storage on both walls.
This concentration reduces walking distance during cooking and lets you install tall storage on one side and appliances on the other for balance.
To avoid a tunneled feeling, use light-tone finishes, reflective backsplashes, and continuous flooring to visually widen the space.
Recommended clearances are typically 36 inches between runs for single cooks and 42 inches for multiple users to maintain comfortable movement.
Optimizing a galley often involves using full-height storage at one end and clearing sightlines to adjacent rooms; that leads to considering U- and L-shaped solutions where width allows.
What Are the Advantages of U-Shaped and L-Shaped Kitchen Designs?
U-shaped kitchens deliver continuous counter and storage runs on three sides, making them excellent for small footprints that have a bit more width.
They centralize the kitchen triangle and offer abundant surface area for prep and small appliances.
L-shaped kitchens are more flexible for open-plan homes, preserving sightlines into living spaces while maintaining efficient work zones.
Corner storage strategies—lazy Susans, blind-corner pullouts—convert awkward spaces into accessible storage, maximizing the advantages of both configurations.
Choosing between U and L shapes hinges on whether you prioritize maximum dedicated kitchen space (U) or open connectivity with living areas (L); next, we discuss compact islands and peninsulas that can augment either plan.
How Can Compact Islands and Peninsulas Enhance Small Kitchen Flow?
Compact islands and peninsulas add prep surface, storage, and casual seating without requiring a full island footprint.
Narrow islands as shallow as 18–24 inches can provide useful worktops and storage while maintaining recommended clearance aisles of 36 inches.
Portable islands on casters offer flexibility—move them aside for bigger gatherings and return them for daily prep.
When seating is needed, a peninsula with overhang creates a dining spot without partitioning space with a full table.
Selecting dimensions and mobility features early prevents blocking workflow later; next we examine the kitchen triangle principle and how it applies to small footprints.
What Is the Kitchen Triangle and Why Is It Important in Small Kitchens?
The kitchen triangle links the sink, refrigerator, and cooktop into an efficient workflow by minimizing travel between primary tasks; in small kitchens this principle is even more critical because short distances amplify any inefficiency.
Recommended total triangle perimeter in small kitchens is often 12–26 feet, with each leg ideally between 4 and 9 feet to balance reach and clearance.
Exceptions arise with integrated appliances or multi-cook households where multiple work zones may be preferable.
Thoughtful planning adapts the triangle to compact footprints while maintaining ergonomic spacing for safe and comfortable use.
Understanding the triangle informs appliance selection and positioning, which we explore next.
Which Design Tricks Make a Small Kitchen Look Bigger and Brighter?
Design choices that increase perceived space work by maximizing light, minimizing visual clutter, and creating continuous lines that trick the eye into seeing more depth.
Light color palettes, reflective finishes, integrated appliances, and layered lighting are the primary levers to amplify brightness and perceived volume.
These tactics work together: paint and finish create the backdrop, lighting sculpts depth, and appliance integration maintains a streamlined visual field.
Below is a compact list of practical design tricks you can implement in a remodel or cosmetic refresh.
Use light, warm neutrals on walls and cabinetsto reflect daylight and create openness.
Choose reflective backsplashes or high-gloss surfacesto bounce light and add depth.
Integrate appliances with cabinet panelsto reduce visual interruptions.
Layer lighting—ambient, task, accentto eliminate shadows and highlight depth.
Maintain continuous countertops and aligned cabinet linesto create elongation.
These design choices are highly effective and often cost-efficient; painting and color selection in particular can transform perception rapidly, which connects directly to professional painting and color consultation services discussed below.
Laton Precision Painting and Elite General Contracting Group bring local Long Island expertise to design-focused painting and color selection. Laton Precision Painting's offering to "Offer Professional Residential Painting Services" pairs with Elite General Contracting Group's full remodel scope to help homeowners implement cohesive palettes that enhance perceived space. Professional color consultation and expert paint application are affordable, high-impact remodel tactics: a well-chosen lighter cabinet color, matched with reflective backsplash materials and professionally executed trim lines, increases brightness and makes small kitchens feel larger. For homeowners prioritizing quick visual impact, strategic painting and surface refinishing often top the list of first-phase remodel actions.
The role of lighting and integrated appliances follows from color and finishes, so the next section explains lighting strategies that work well in tight kitchens.
How Do Light Color Palettes and Reflective Surfaces Create Spaciousness?
Light color palettes expand perceived volume by increasing reflected light and reducing strong shadows that define small spaces.
Pale neutrals—warm whites, soft greiges, and muted pastels—create uniform backgrounds that allow cabinetry and countertops to read as continuous planes.
Reflective surfaces, such as glass or gloss tile backsplashes, multiply light and add perceived depth.
High-gloss cabinets amplify this effect but require careful handling to avoid showing imperfections; matte finishes can hide texture while still brightening the space when paired with lighter wall tones.
Using coordinated trim and hardware in low-contrast tones preserves continuous lines leading the eye across the room, which connects directly to how layered lighting further enhances depth.
What Role Does Layered and Natural Lighting Play in Small Kitchens?
Layered lighting combines ambient ceiling fixtures, targeted task lighting (under-cabinet and over-sink), and accent lights to eliminate shadows and create visual layers that increase perceived depth.
Maximizing natural light through unobstructed windows or small skylights provides strong baseline illumination, while under-cabinet strips and recessed fixtures create task visibility and highlight surfaces.
Accent lighting along toe-kicks or open shelving draws the eye to depth cues, making the room feel larger.
Lighting control—dimmers and zoned switches—lets you tailor illumination to tasks and mood, improving both function and atmosphere.
Effective lighting design reduces the need for high-contrast finishes and enables integrated appliances to blend into a cohesive visual field, which is discussed next.
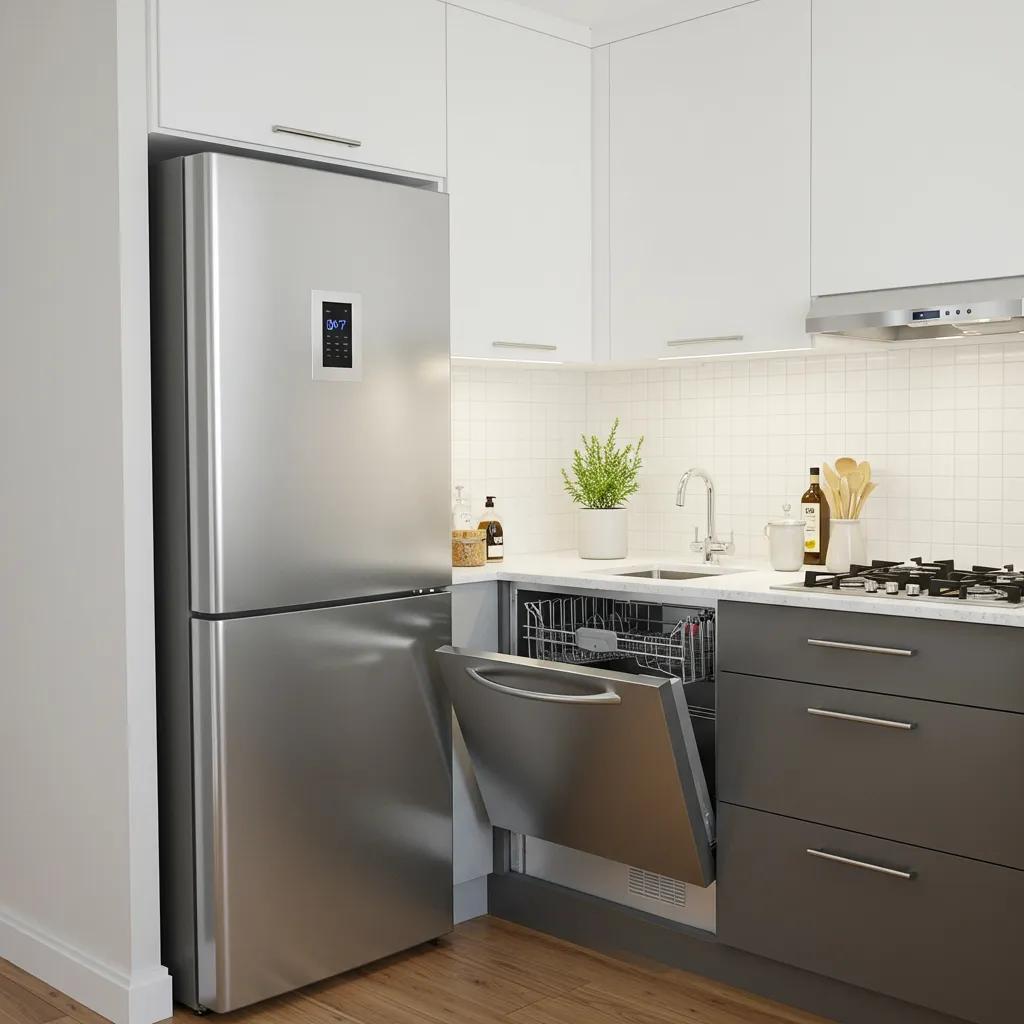
How Can Integrated Appliances Streamline Small Kitchen Appearance?
Integrated appliances with panel-ready fronts or compact drawer-style dishwashers maintain uninterrupted cabinet lines that read as continuous surfaces, reducing visual fragmentation.
Panel-ready refrigerators and dishwashers hide hardware and vents when properly planned, making cabinetry appear longer and more cohesive.
Compact appliance models—counter-depth fridges, 24" ranges, and drawer dishwashers—limit protrusion into walkways and free up circulation space.
Efficient ventilation and proper planning for maintenance access are essential when integrating appliances behind panels.
Streamlined appliance design complements continuous visual lines and helps small kitchens appear intentional rather than overcrowded; next we outline which visual line techniques most effectively lengthen and open a compact kitchen.
What Visual Lines and Layout Techniques Enhance Perceived Space?
Continuous countertops, aligned upper and lower cabinet lines, and horizontal backsplash patterns elongate small spaces and reduce visual breaks that shorten sightlines.
Minimizing hardware contrast and using recessed pulls or integrated handle details keeps surfaces seamless.
Horizontally laid tiles and long-format planks on the floor guide the eye across the room, creating the impression of greater depth.
Strategic trim and uniform cabinet heights contribute to a coherent plane that the eye reads as expanded space.
These visual line strategies tie directly into budget sequencing decisions, which are explored in the next major section.
What Are Budget-Friendly Tips for Small Kitchen Remodels?
A phased approach yields the most value for limited budgets: prioritize high-impact cosmetic changes first, then invest in storage and appliances as funds allow.
Cost-effective materials and selective DIY work can stretch a remodel budget without compromising long-term durability.
The mechanism is prioritization: choose actions that deliver the largest perceived and functional gains per dollar—paint, lighting upgrades, new hardware—before moving to cabinetry or appliance replacement.
Below is a stepwise phased plan and appliance guidance to help homeowners allocate budget efficiently.
Phase 1: Paint, lighting, and hardwareto refresh appearance and brightness.
Phase 2: Storage upgrades and cabinet organizersto improve function without full replacement.
Phase 3: Appliance and countertop upgradesscheduled when budget allows.
Phase 4: Custom cabinetry or layout changesfor long-term optimization.
This phased plan balances upfront impact with longer-term investment; next we discuss specific budget-minded material and DIY options.
Laton Precision Painting can "Offer Professional Residential Painting Services" as an affordable first phase that refreshes color and finishes to expand perceived space immediately. Request a painting consultation to evaluate which surfaces and palettes will deliver the best return on a modest budget and to plan follow-on phases that preserve newly refreshed finishes.
How Can Cost-Effective Materials and DIY Elements Save Money?
Cost-effective remodels use durable mid-range materials for high-traffic areas and reserve premium finishes for focal points.
A fresh coat of paint, new hardware, and targeted under-cabinet lighting often provide transformational results at low cost.
DIY tasks like painting and installing open shelving can reduce labor spend, but structural, electrical, and plumbing work should be left to professionals to avoid costly mistakes.
Time investment and realistic skill assessment determine whether a DIY approach is sensible for each homeowner.
Understanding where to DIY versus hire professionals informs which phases to schedule first—paint and light upgrades create a good base for later cabinet and appliance investments.
What Are Smart Appliance Choices for Budget Small Kitchen Renovations?
Compact, energy-efficient appliances offer space savings and lower operating costs without compromising necessary function.
Drawer dishwashers, counter-depth refrigerators, and combination microwave-convection ovens conserve space while preserving capability.
Energy-efficient models may cost more upfront but provide long-term savings on energy bills, and they can often fit within standard cabinet openings to avoid costly cabinet alterations.
Spend selectively on appliances you use daily and economize on secondary items.
Appliance decisions influence layout and cabinetry planning, so coordinate selection early in a phased remodel to avoid rework in later stages.
How to Plan a Phased Remodel to Maximize Budget Efficiency?
Plan phases with clear objectives and measurable outcomes—Phase 1 should improve daily function and perception, Phase 2 should address storage and workflow, and Phase 3 should finalize appliances and surfaces.
Allocate budget percentages by priority (for example, 20–30% for paint/lighting/hardware, 30–40% for cabinetry and storage, 30–40% for appliances and counters) while maintaining contingency funds for surprises.
Maintain kitchen function during remodels by scheduling work in short bursts or creating temporary prep zones to reduce disruption.
A well-sequenced plan reduces overall cost and stress; when broader construction or permit work is needed, local contractors can streamline execution, a topic covered in the following section.
How to Choose Appliances and Fixtures That Maximize Small Kitchen Space?
Choosing the right appliances and fixtures hinges on balancing footprint, functionality, and integration with cabinetry and ventilation.
Compact and multi-functional appliances free up circulation and storage, while smart fixtures reduce countertop clutter and improve ergonomics.
Appliance | Space Footprint | Functionality | Suggested Use Case |
Drawer Dishwasher | Narrow height, shallow depth | Flexible loading, ergonomic | Small households, minimal footprint |
Counter-Depth Refrigerator | Reduced projection from cabinets | Standard refrigeration capacity | Preserves aisle clearance |
Combination Microwave-Convection Oven | Single wall or countertop unit | Baking and reheating functions | Eliminates separate oven in very small kitchens |
Compact Range (24") | Narrower cooktop and oven | Full-range cooking in smaller profile | Tight installations with limited wall space |
Washer/Dryer Combo | Stackable or single-unit | Laundry + drying in one unit | Multi-use utility spaces adjacent to kitchen |
This comparison helps prioritize which compact models yield the biggest space savings; next we cover specific compact appliance recommendations and installation considerations.
What Are the Best Compact and Multi-Functional Kitchen Appliances?
Top compact options include 24-inch refrigerators, drawer-style dishwashers, and microwave-convection combos that perform multiple tasks within a smaller envelope.
Trade-offs involve capacity versus footprint—choose a slightly smaller fridge if vertical pantry storage compensates.
Venting and service access must be planned in advance to avoid costly retrofits.
When possible, select ENERGY STAR-rated models to reduce long-term operating costs.
Selecting appliances early prevents layout conflicts and supports a smooth remodel timeline; next we discuss fixtures that improve functionality without occupying additional space.
How Do Smart Fixtures Improve Small Kitchen Usability?
Smart fixtures—pull-down faucets, touchless taps, and integrated soap dispensers—reduce countertop clutter and improve hygiene while keeping tasks efficient.
Compact sink basins with deep bowls offer surprising capacity without needing larger cabinet openings.
Touchless and motion-sensor technologies also allow single-handed operation when prepping meals, a convenience in tight spaces.
Professional installation ensures proper water pressure, filtration compatibility, and long-term reliability.
Smart fixtures complement compact appliances and storage systems, creating a cohesive small-kitchen ecosystem; the following subsection highlights smart technology options that further streamline functionality.
What Smart Technology Options Enhance Small Kitchen Functionality?
Smart ovens, app-controlled lighting, and sensor-based ventilation can automate common tasks and reduce the need for extra physical controls or bulky panels.
Lighting automation with scenes for cooking and entertaining compresses multiple fixtures into intuitive control while sensors can manage ventilation based on cooking activity.
Integration complexity varies—simple smart bulbs require minimal setup, whereas full appliance networking requires more planning.
Evaluate privacy, maintenance, and compatibility when choosing connected devices.
These technology options can minimize the need for physical space dedicated to controls and improve overall efficiency; now we shift to why local expertise matters for implementation on Long Island.
Why Should Long Island Homeowners Choose Local Experts for Small Kitchen Remodels?
Local experts bring familiarity with regional home styles, common structural constraints, and permitting processes that streamline remodels and avoid common pitfalls.
Long Island climates and typical house constructions influence material choice and moisture management, and local contractors coordinate trades—plumbing, electrical, cabinetry, and painting—to keep schedules tight.
Combining remodeling services with color consultation and professional painting ensures cohesive results that maximize perceived space and resale appeal.
How Does Elite General Contracting Group Tailor Small Kitchen Remodels for Long Island Homes?
Elite General Contracting Group coordinates multi-trade teams to deliver kitchen remodels that respect local building practices and seasonal scheduling typical to Suffolk County.
Their approach emphasizes project management, permitting guidance, and trade coordination so the homeowner experiences fewer delays and clearer communication.
Partnering with local painting specialists and cabinet makers ensures finishes and color selections align with Long Island architectural contexts.
This local tailoring reduces rework and helps align design choices with resale expectations in nearby neighborhoods.
What Are Real Case Studies of Small Kitchen Remodels in Suffolk County?
A useful case study includes the homeowner's challenge (limited storage and poor lighting), the design solution (vertical cabinetry, integrated appliances, lighter palette), and measurable outcomes (increased storage capacity, improved workflow, perceived brightness).
Photos documenting before-and-after configurations, storage increases (e.g., added linear feet of shelving), and homeowner satisfaction provide concrete evidence of impact.
Including neighborhood context—typical Long Island home styles—helps readers evaluate applicability to their own projects.
How Can Professional Color Consultation Improve Small Kitchen Design?
Color consultation aligns paint choices, cabinet finishes, and backsplash materials to expand perceived space while supporting durable, cleanable surfaces.
A consultant assesses natural light, existing finishes, and homeowner preferences to propose palettes and sheen levels that maximize reflectance and cohesion.
Painting and finishing choices are cost-effective ways to refresh a kitchen and often precede more expensive cabinetry or appliance investments.
Professional painting execution preserves intended color relationships and ensures clean transitions at trim lines and around fixtures.
What Is the Process for Getting a Free Consultation on Small Kitchen Remodels?
A typical consultation begins with an initial contact to schedule an on-site visit where measurements, photos, and homeowner goals are documented; the contractor or painting specialist then prepares a scope and phased proposal.
Expect a timeline estimate, recommended phases, and a rough budget range, with follow-up to refine selections and scheduling.
Homeowners should prepare photos of the current layout, a wish list, and any inspiration images to aid accurate scoping.
Clear proposals reduce change orders and align expectations for both cosmetic and structural work.
When you’re ready, request a free consultation from local providers to get a tailored plan; the next section answers common homeowner questions about maximizing small-kitchen space.
What Are Common Questions About Maximizing Space in Small Kitchens?
This FAQ-style section addresses recurring homeowner concerns with concise, actionable answers that highlight priority actions, color choices, functional upgrades, and appliance selections.
Each answer offers a quick strategy and an internal link suggestion to deeper sections for implementation steps.
How Do You Maximize Space in a Small Kitchen?
Maximizing space starts with decluttering, zoning work areas by frequency of use, and adding vertical storage and organizers to reclaim unused volume.
Improve lighting and choose lighter paint colors to increase perceived space, then select compact appliances and integrated storage solutions to preserve circulation.
Prioritize quick wins—paint, lighting, hardware—before more costly cabinetry changes so you gain immediate benefits and better inform later investments.
These practical steps lead directly to specific storage and layout strategies discussed earlier in the guide.
This approach aligns with research on optimizing kitchen layouts for efficiency and functionality.
What Are the Best Colors for Making a Small Kitchen Look Bigger?
Best colors include warm whites, soft greiges, and pale pastel neutrals that reflect light without feeling clinical; pair them with low-contrast trim for continuous lines.
High-reflectance backsplashes and light countertops boost brightness, while a slightly darker floor grounds the room.
Finish selection matters: satin or low-gloss on cabinets balances reflectivity with durability.
Refer to the color consultation subsection for guidance on tailoring palettes to your kitchen’s natural light and finishes.
How Can I Make My Small Kitchen More Functional?
Improve function by clarifying the kitchen triangle, installing pull-out storage and organizers, and using multi-functional islands or fold-down tables for intermittent dining.
Map daily routines to identify high-use zones and put frequently used items within primary reach.
Upgrading to compact, energy-efficient appliances can free circulation space for movement and prep.
These prioritized actions support a phased approach to remodel planning discussed above.
These functional improvements are key to transforming a small kitchen from cramped to convenient.
What Are Clever Storage Ideas for Tiny Kitchens?
Clever hacks include toe-kick drawers for flat storage, over-the-sink shelves to reclaim counter space, vertical dividers for baking sheets, and magnetic strips for knives on the backsplash.
Use high-mounted shelves for seasonal items and pull-down mechanisms for upper cabinets to maintain accessibility.
Combine open and closed storage for practical and aesthetic balance.
These ideas integrate with the earlier storage comparison and EAV table to guide implementation.
Which Appliances Work Best in Small Kitchen Spaces?
Drawer dishwashers, counter-depth refrigerators, 24-inch ranges, and combination microwave-convection ovens are top picks for tight footprints; prioritize ENERGY STAR-rated models when possible.
Choose appliance sizes that match household needs—a smaller household benefits more from compact units—while ensuring proper ventilation and service access.
Coordinate appliance selection early to prevent cabinet rework during installation.
Appliance choices should align with your phased remodel plan to balance cost and impact.
Selecting the right appliances is crucial for maximizing both space and utility in a compact kitchen.

Comments